Preview mode lets you test container changes on your real site before anyone else sees them. Click Preview in the top right of your GTM workspace, enter your site's URL, and click Connect; your site opens with a Tag Assistant badge while the Tag Assistant tab shows every event as it happens, which tags fired, which didn't, and why. Only your browser sees the draft container, so you can test freely. Nothing goes live until you click Submit.
Preview mode is the difference between publishing tags and publishing guesses. It runs your draft container on your real site, visible only to you, and narrates exactly what fires, what doesn’t, and why, before any of it touches your visitors or your data.
If GTM is new to you, the beginner’s guide covers the model this sits on; this guide is about the testing workflow you’ll use before every single publish.
Start a preview session
Click Preview in your workspace
In your GTM workspace at tagmanager.google.com, click Preview in the top right. A new tab opens with Tag Assistant.
GTM workspace PreviewYou should see: Tag Assistant asking for your website’s URL.
Connect to your site
Enter the URL of the page you want to start on (your homepage is fine) and click Connect. Your site opens in a new window, with a small Tag Assistant badge indicating the debug session is live.
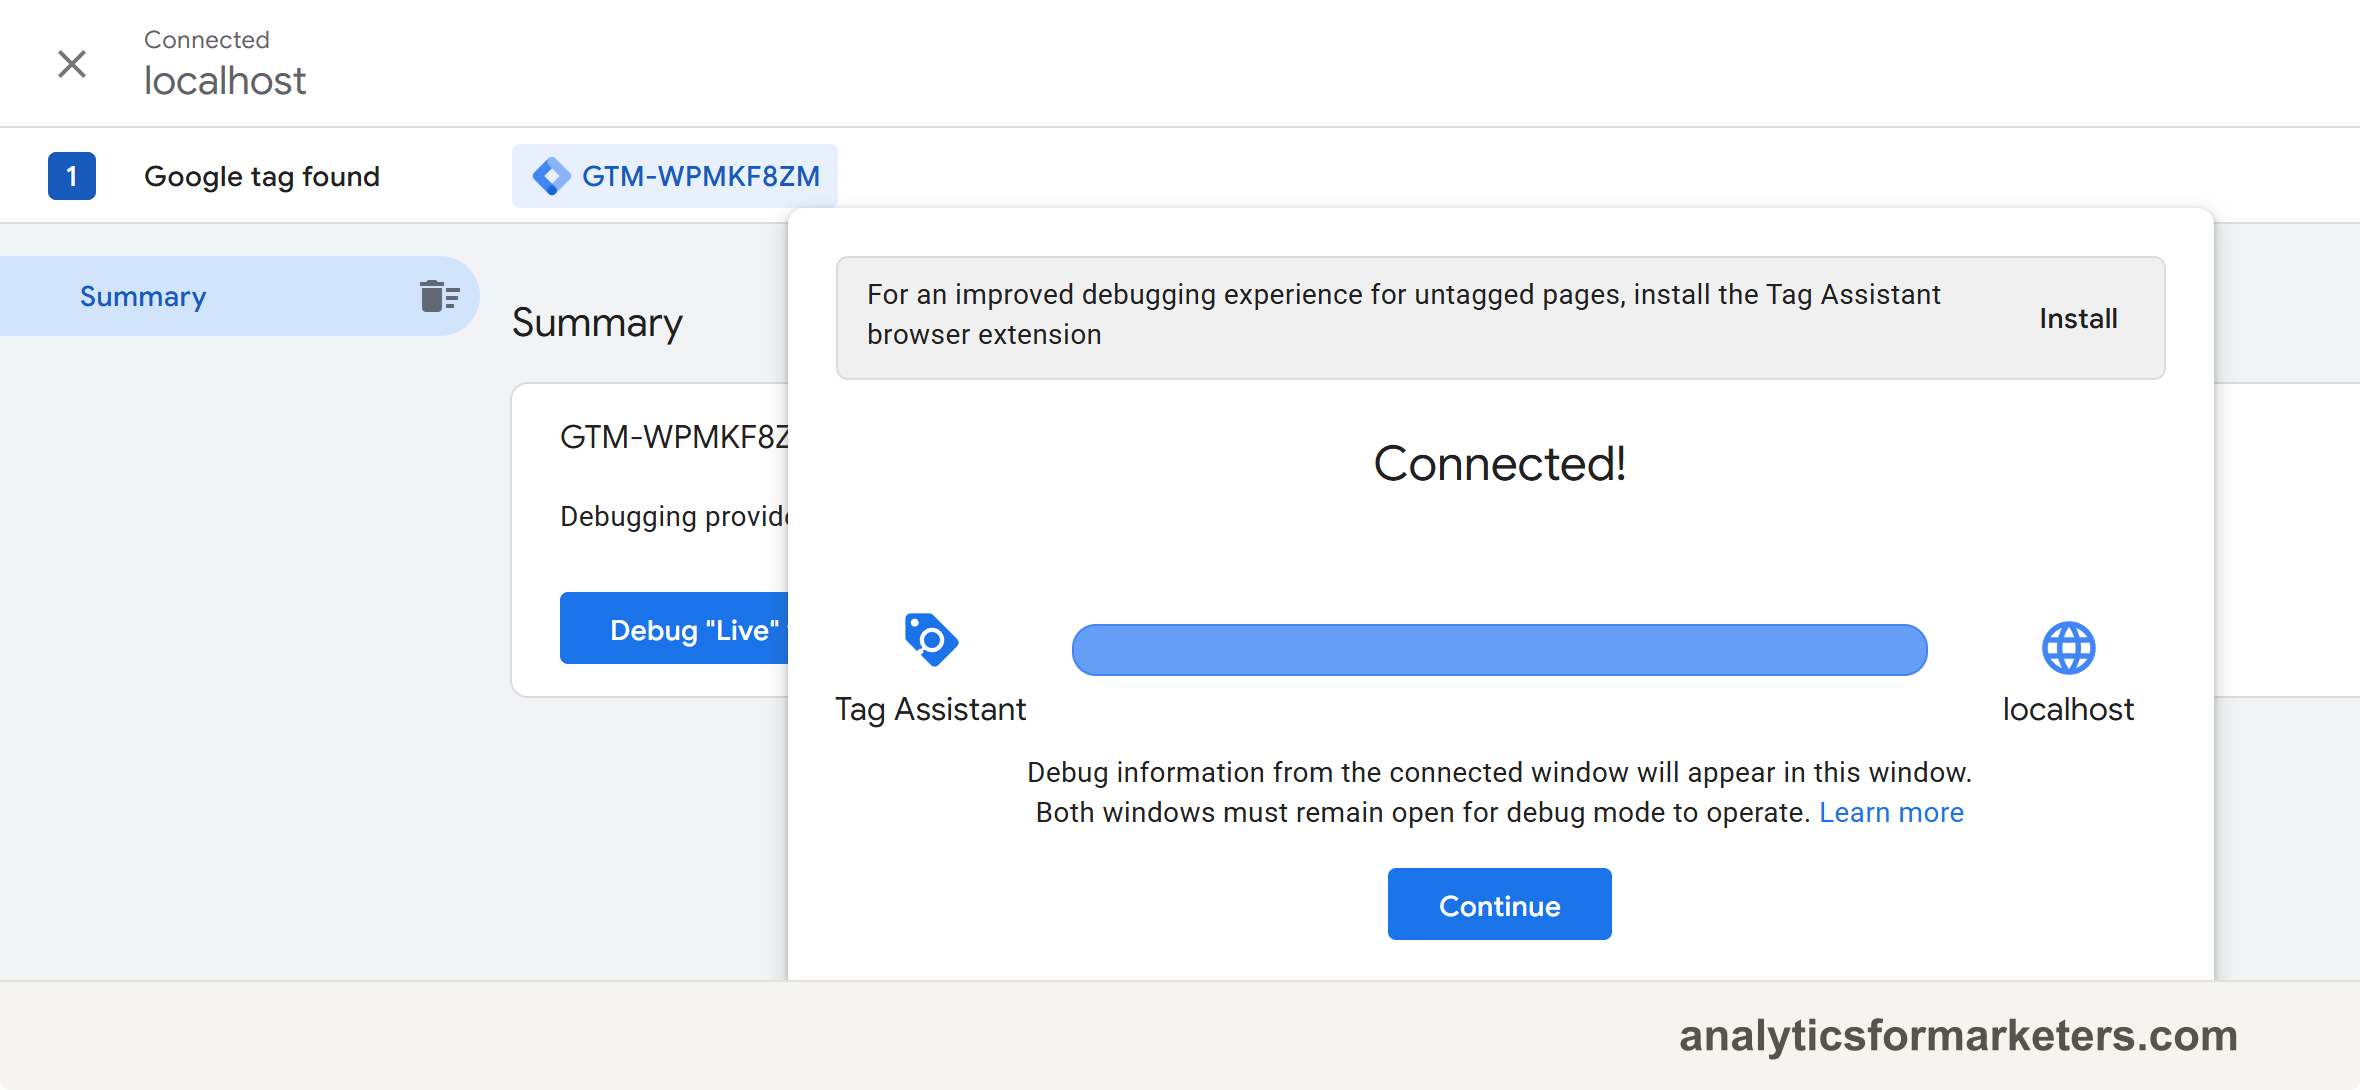
You should see: back in the Tag Assistant tab, a “Connected” confirmation and a summary view beginning to fill with events.
If it won’t connect: disable ad blockers in the testing browser, allow the popup, make sure GTM is actually installed on the page, and if your site sits behind a password (unlaunched stores, staging), get past the password in the opened window first.
Browse and interact like a visitor
In the connected site window, do the things you want to test: navigate between pages, click the button you’re tracking, submit the test form. Every action lands in Tag Assistant’s left-hand timeline as an event.
Read what Tag Assistant is telling you
The interface has three areas that matter:
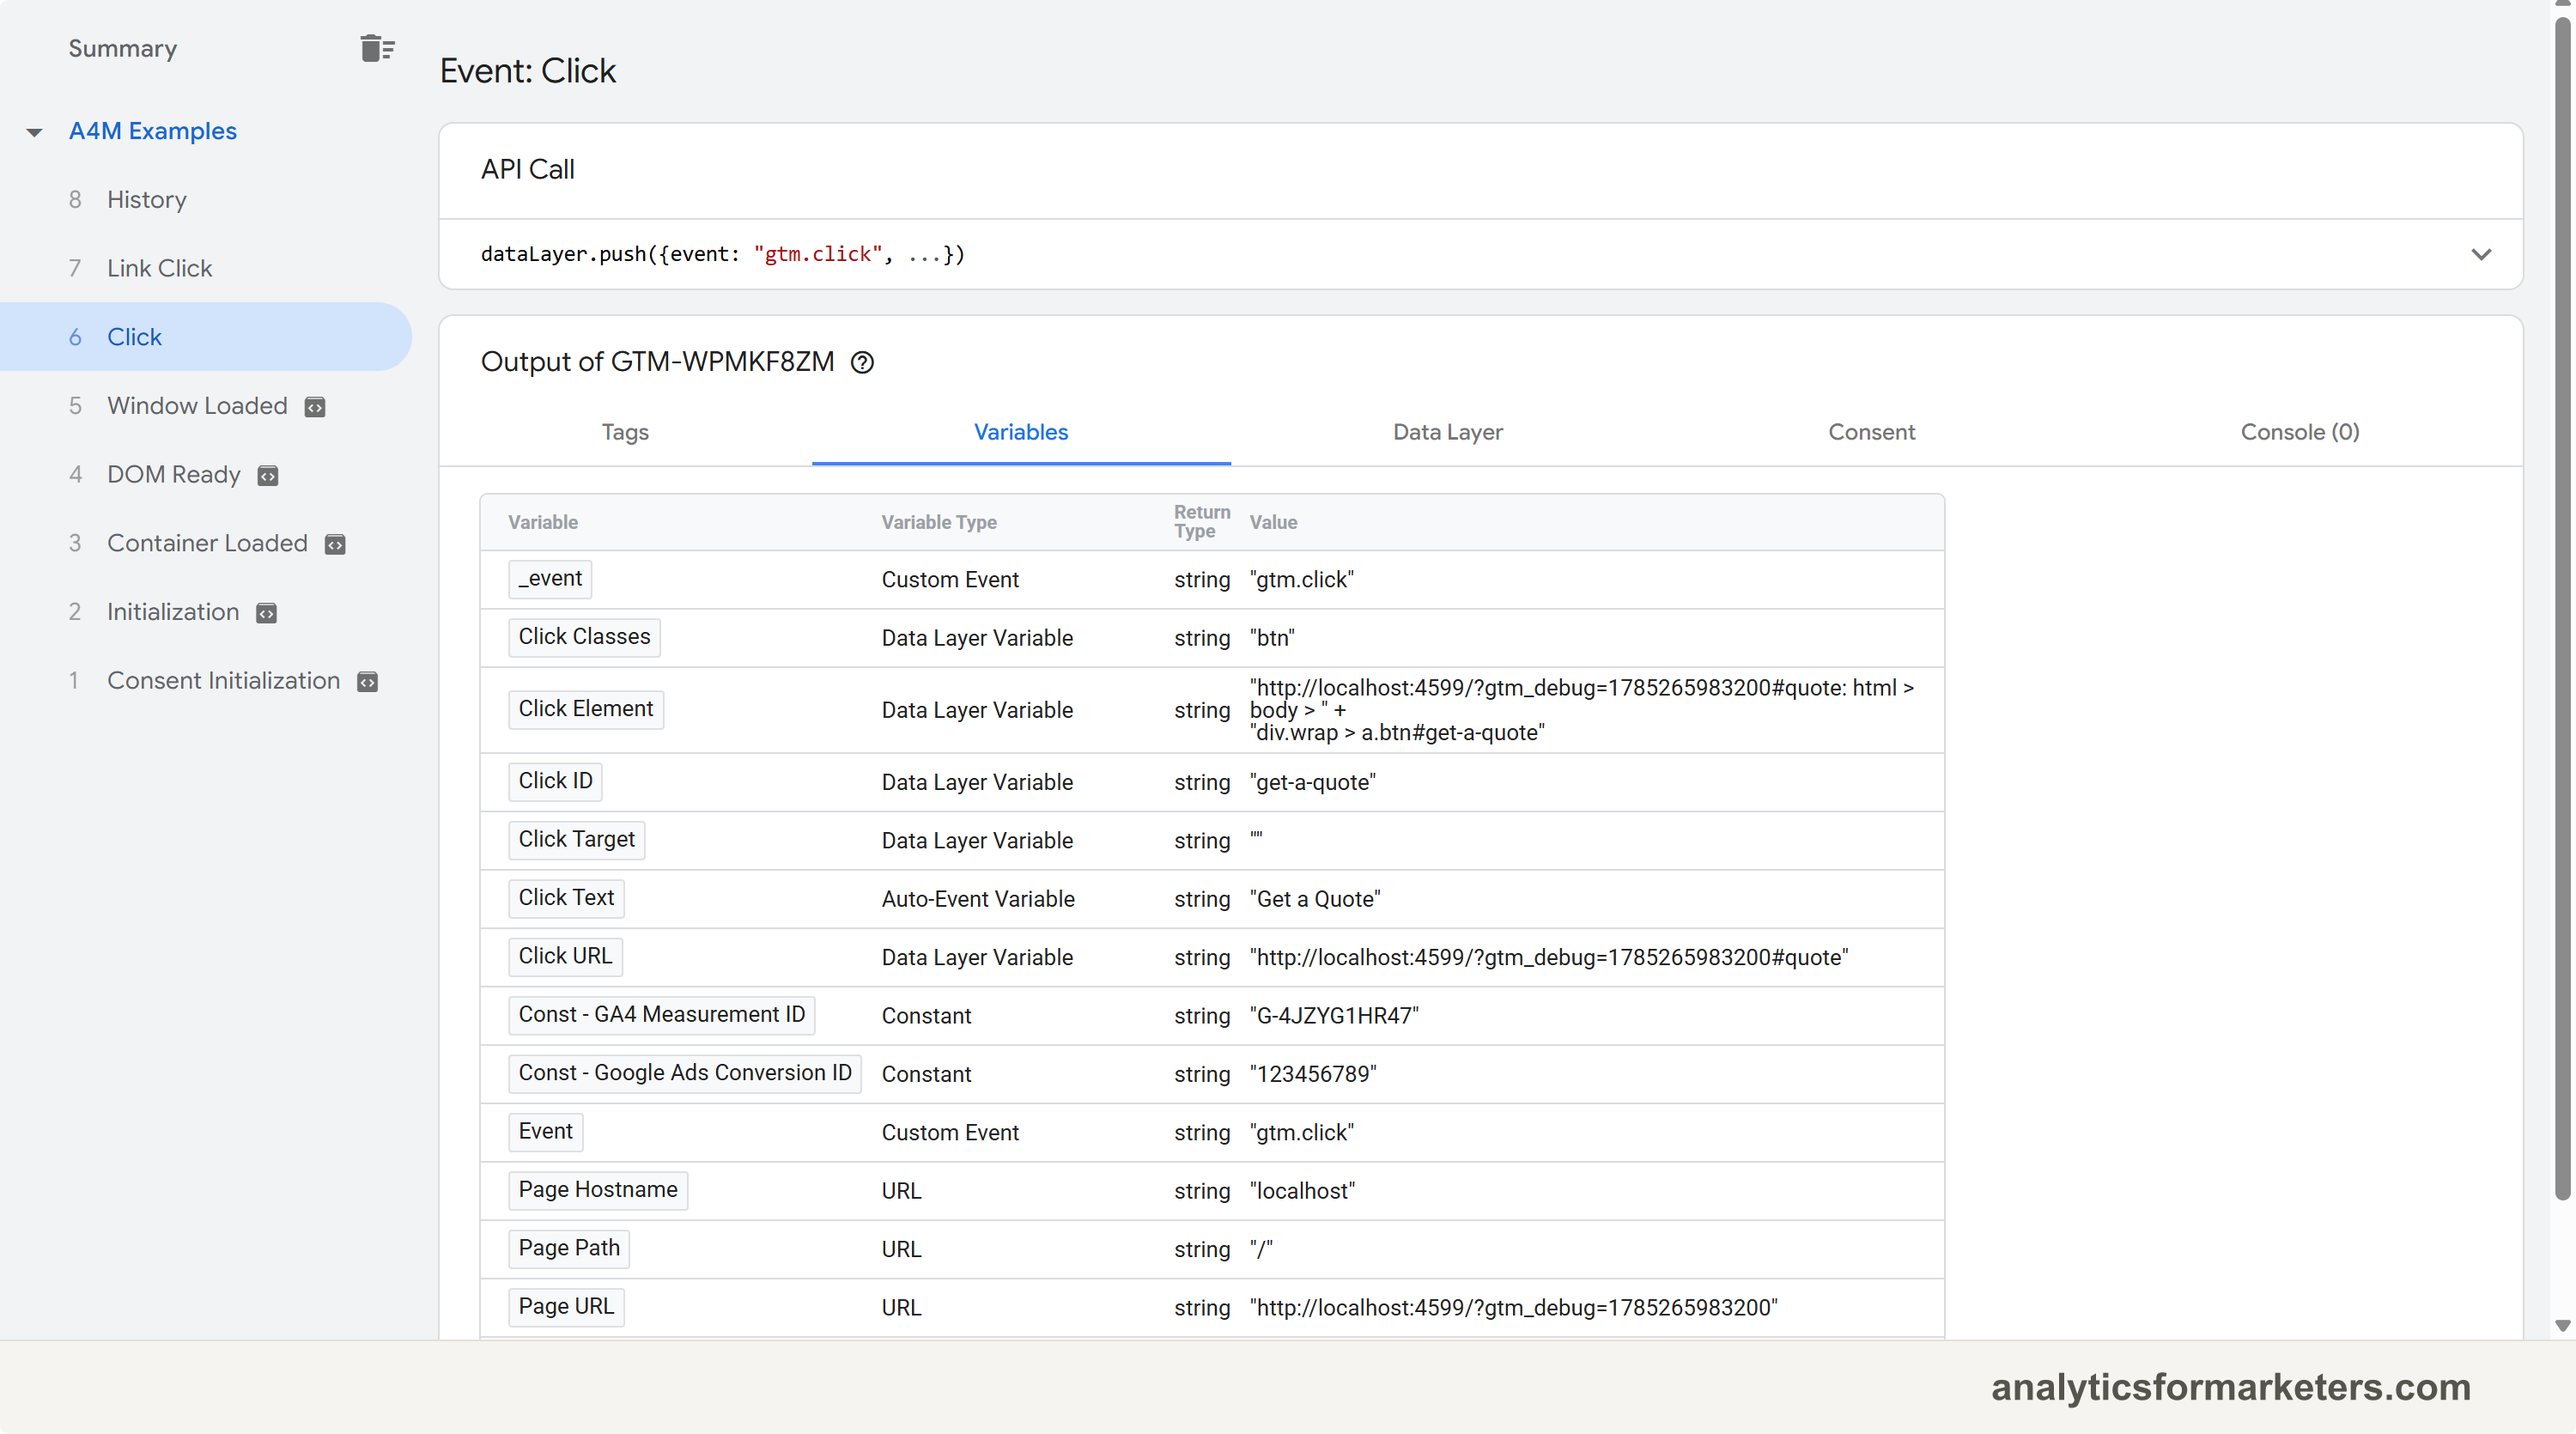
The event timeline (left). Every page load produces its standard sequence (Consent Initialization, Initialization, Container Loaded, DOM Ready, Window Loaded), and your interactions add events like Link Click or Form Submit, plus any custom events your site pushes. Select any event to inspect that exact moment.
Tags Fired / Not Fired (center). For the selected event, which tags ran and which didn’t.
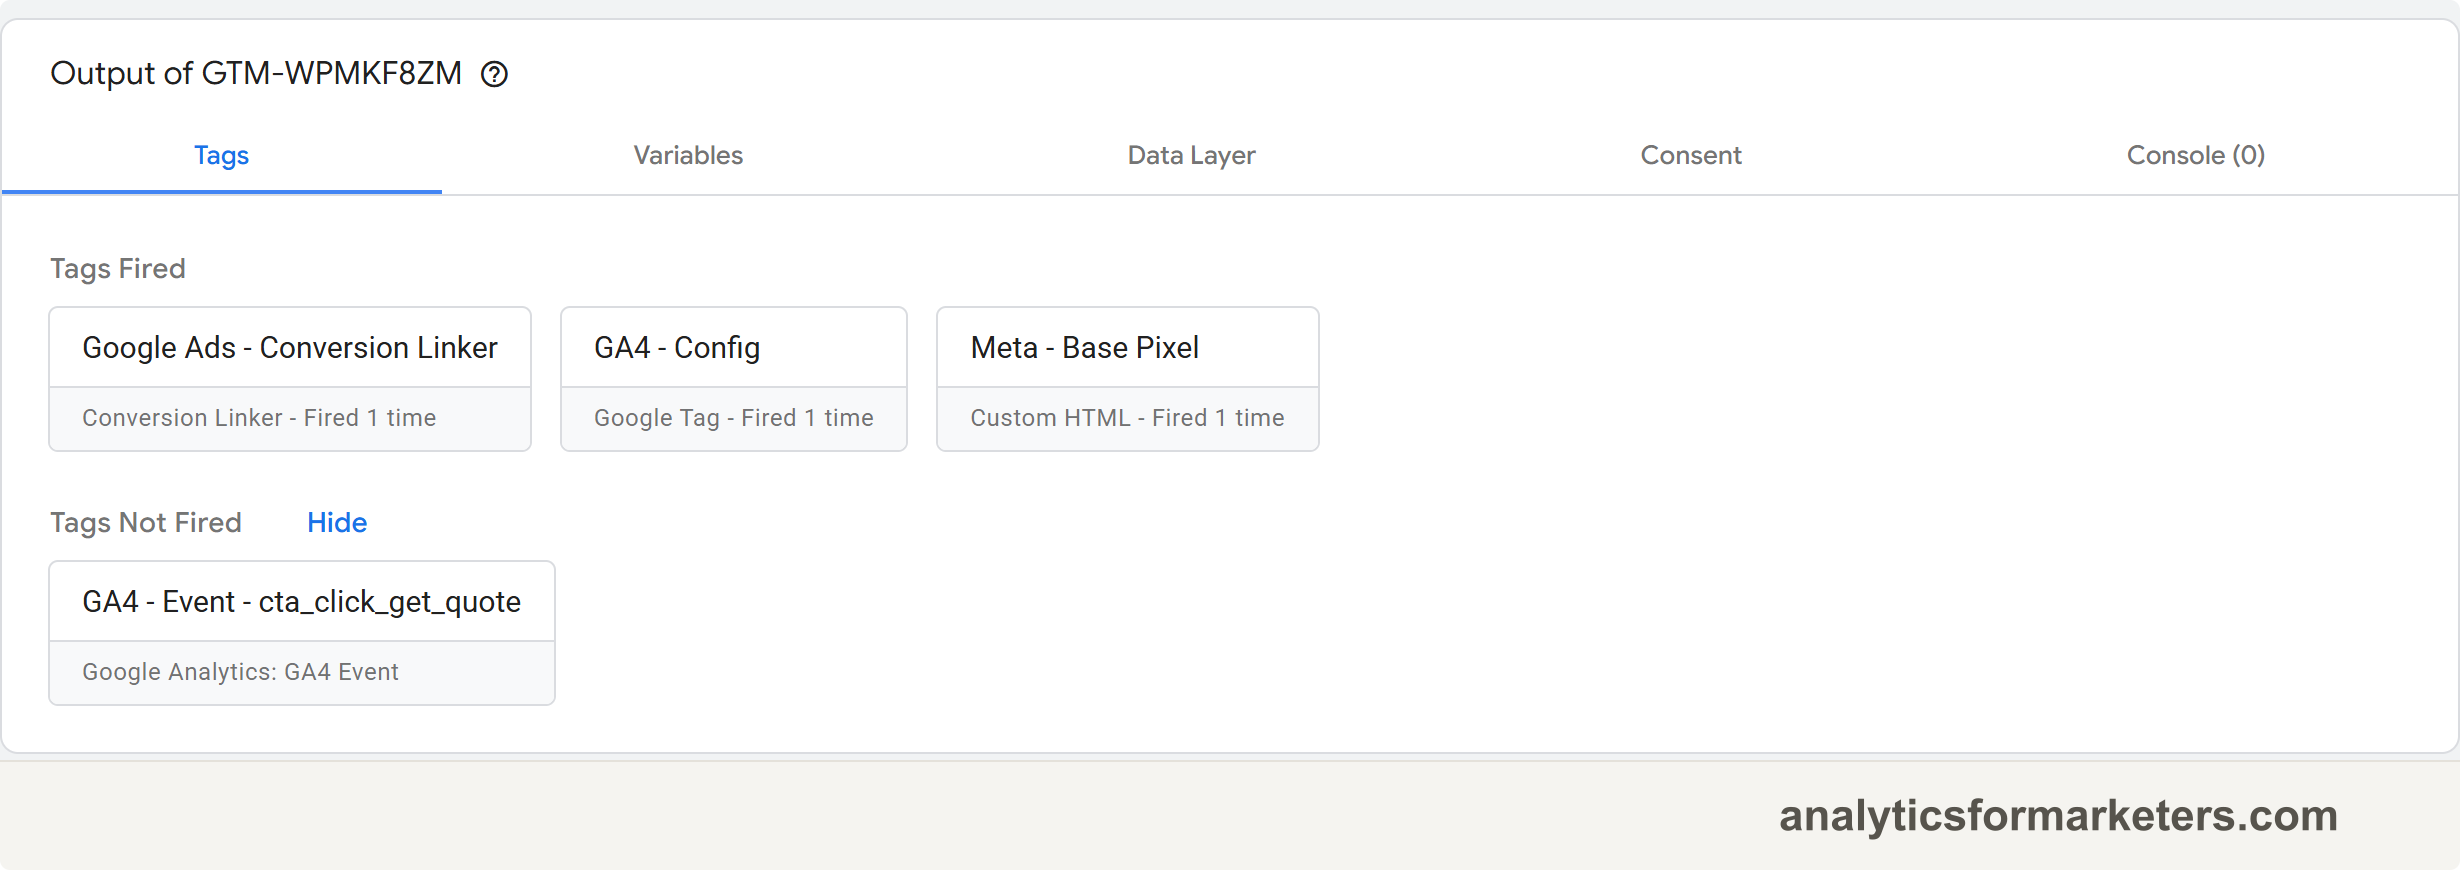
The detail tabs. Click a tag to see its settings and, crucially, its firing triggers with a check or X per condition against the real values. Click an event and open the Variables tab to see what every variable held at that instant, or the Data Layer tab to see exactly what the page pushed.
The debugging loop
Almost every “tag won’t fire” session resolves the same way:
- Select the event that should have triggered the tag. If the event itself is missing (no Link Click when you clicked), the trigger type isn’t listening for that interaction; a common example is a click trigger without the built-in Click variables enabled, or a JavaScript-heavy form that never emits a browser submit event.
- Click the Not Fired tag and read its conditions. One will show an X. Compare the condition against the Variables tab’s live value: capitalization, whitespace, a child element’s text instead of the button’s, a URL with a trailing slash.
- Fix the trigger or variable in GTM, then restart Preview. A running session does not pick up workspace edits on its own: go back to GTM, click Preview again so Tag Assistant syncs the updated draft, then refresh the site window and test again.
- When everything fires clean, publish. Preview tests the draft; visitors get nothing until you click Submit and publish the version. Name the version while you’re there; six months from now, “added GA4 pricing click event” beats “Version 14.”
A preview session automatically flags your GA4 hits as debug traffic, so they stream into GA4 > Admin > Data display > DebugView with full parameters. Tag Assistant proves the tag fired; DebugView proves GA4 received what you meant to send, with the event name and parameters spelled out. The GA4 troubleshooting guide covers DebugView in more depth.
Habits that keep containers trustworthy
- Preview before every publish, no exceptions. The five minutes is cheaper than a week of silently broken data. Publishing untested changes is how containers rot.
- Test the negative case too. A trigger that fires everywhere is as broken as one that never fires; click something that shouldn’t trigger the tag and confirm silence.
- Leave the session, then verify live. After publishing, exit preview and do one real-world spot check (page source, or a quick DebugView pass) so you know the published version behaves like the draft did.
From here, the natural next steps are the recipes that lean on this workflow: tracking button clicks end to end, and understanding the trigger types you’ll be debugging.