The easiest way is the free GTM4WP plugin. Install it from Plugins > Add New Plugin, activate it, go to Settings > Google Tag Manager, paste your container ID (the code starting with GTM-), and save. The plugin places both GTM code snippets on every page in the right spots. If you'd rather not add a plugin, paste the two snippets manually with a code plugin like WPCode or directly into a child theme's header.php. Either way takes about 10 minutes.
By the end of this tutorial, Google Tag Manager will be running on every page of your WordPress site, verified and ready to hold your GA4 tag, ad pixels, and click tracking. Two methods, both free: a plugin that does the placement for you, or pasting the code yourself.
This is the WordPress-specific version of our general GTM installation guide. New to GTM entirely? The Google Tag Manager beginner’s guide explains what tags, triggers, and variables are before you install anything.
You’ll need a GTM container ID, the code starting with GTM-. It’s in the top bar of your workspace at tagmanager.google.com. No container yet? The GTM setup guide covers creating one in about 2 minutes, then come back here. You’ll also need Administrator access to your WordPress site.
This guide assumes self-hosted WordPress. On WordPress.com, any paid plan can install plugins as of April 2026, so everything below works there too; only the free plan is out.
Which method should you use?
| Best for | Time | |
|---|---|---|
| Method 1: GTM4WP plugin | Almost everyone. Correct placement, survives theme changes, adds data layer extras | 5 min |
| Method 2: manual code | Sites that avoid extra plugins, developers, minimal setups | 10 min |
If you’re unsure, use the plugin. GTM’s snippets have specific placement requirements, and the plugin gets them right on any theme without you thinking about it.
Method 1: the GTM4WP plugin (recommended)
Install and activate GTM4WP
In your WordPress admin, go to Plugins > Add New Plugin and search for GTM4WP. The one you want is “GTM4WP - A Google Tag Manager (GTM) plugin for WordPress” by Thomas Geiger.
Click Install Now, then Activate.
Plugins Add New Plugin Search: GTM4WPYou should see: the plugin listed in your Plugins screen, and a new Google Tag Manager entry under Settings.
Paste your container ID
Go to Settings > Google Tag Manager. On the General tab, paste your container ID (the GTM-XXXXXXX value) into the Google Tag Manager ID field.
Leave the container code placement option at its default. The default places the main snippet in your site’s head and the fallback snippet where your theme supports it, which is right for almost every modern theme.
Click Save Changes.
You should see: the settings page reload with your container ID saved. GTM is now loading on every page of your site.
The other settings tabs can push extra information into GTM’s data layer: post author, category, logged-in status, and full WooCommerce e-commerce events if you run a store. Ignore them for now; the default install is complete without any of it. They become useful later, when you build tags that need that data. The plugin is entirely free, including all the integrations; its developer has publicly committed to keeping it that way.
Method 2: paste the code manually
GTM has two snippets, and each has a required position:
- Snippet 1 goes as high in the
<head>as possible. It loads GTM itself. - Snippet 2 goes right after the opening
<body>tag. It’s a fallback for the rare browser with JavaScript turned off.
Find both in GTM under Admin > Install Google Tag Manager, or by clicking your container ID in the top bar. They look like this, with GTM-XXXXXXX standing in for your real ID:
<!-- Google Tag Manager -->
<script>(function(w,d,s,l,i){w[l]=w[l]||[];w[l].push({'gtm.start':
new Date().getTime(),event:'gtm.js'});var f=d.getElementsByTagName(s)[0],
j=d.createElement(s),dl=l!='dataLayer'?'&l='+l:'';j.async=true;j.src=
'https://www.googletagmanager.com/gtm.js?id='+i+dl;f.parentNode.insertBefore(j,f);
})(window,document,'script','dataLayer','GTM-XXXXXXX');</script>
<!-- End Google Tag Manager --><!-- Google Tag Manager (noscript) -->
<noscript><iframe src="https://www.googletagmanager.com/ns.html?id=GTM-XXXXXXX"
height="0" width="0" style="display:none;visibility:hidden"></iframe></noscript>
<!-- End Google Tag Manager (noscript) -->Option A: a code-snippet plugin (easier). Install WPCode (formerly Insert Headers and Footers), then go to Code Snippets > Header & Footer. Paste snippet 1 into the Header box and snippet 2 into the Body box, then save. Your snippets survive theme updates and theme switches.
Option B: edit your theme. In a child theme, paste snippet 1 into header.php just after the opening <head> tag, and snippet 2 just after the opening <body> tag. If your theme’s header.php calls wp_body_open(), snippet 2 can instead be hooked there. Skip this route unless you’re comfortable editing theme files: a theme update will silently erase direct edits to a parent theme, and your tracking disappears with them.
The snippets above show the structure, but copy yours from your own GTM workspace so they carry your real container ID. And place them exactly where each belongs; swapped or footer-placed snippets make GTM load late and unreliably.
Verify GTM is working
Don’t skip this. A broken install fails silently, and you find out weeks later when the data you wanted isn’t there.
Connect Preview mode
In your GTM workspace, click Preview in the top right. Tag Assistant opens; enter your site’s URL and click Connect. Your site opens in a new window with a Tag Assistant badge in the corner.
You should see: “Connected” in Tag Assistant, and your site listed as the connected page.
Check what fired
Back in the Tag Assistant tab, look at the Summary view. Click around your site in the connected window and watch events appear.
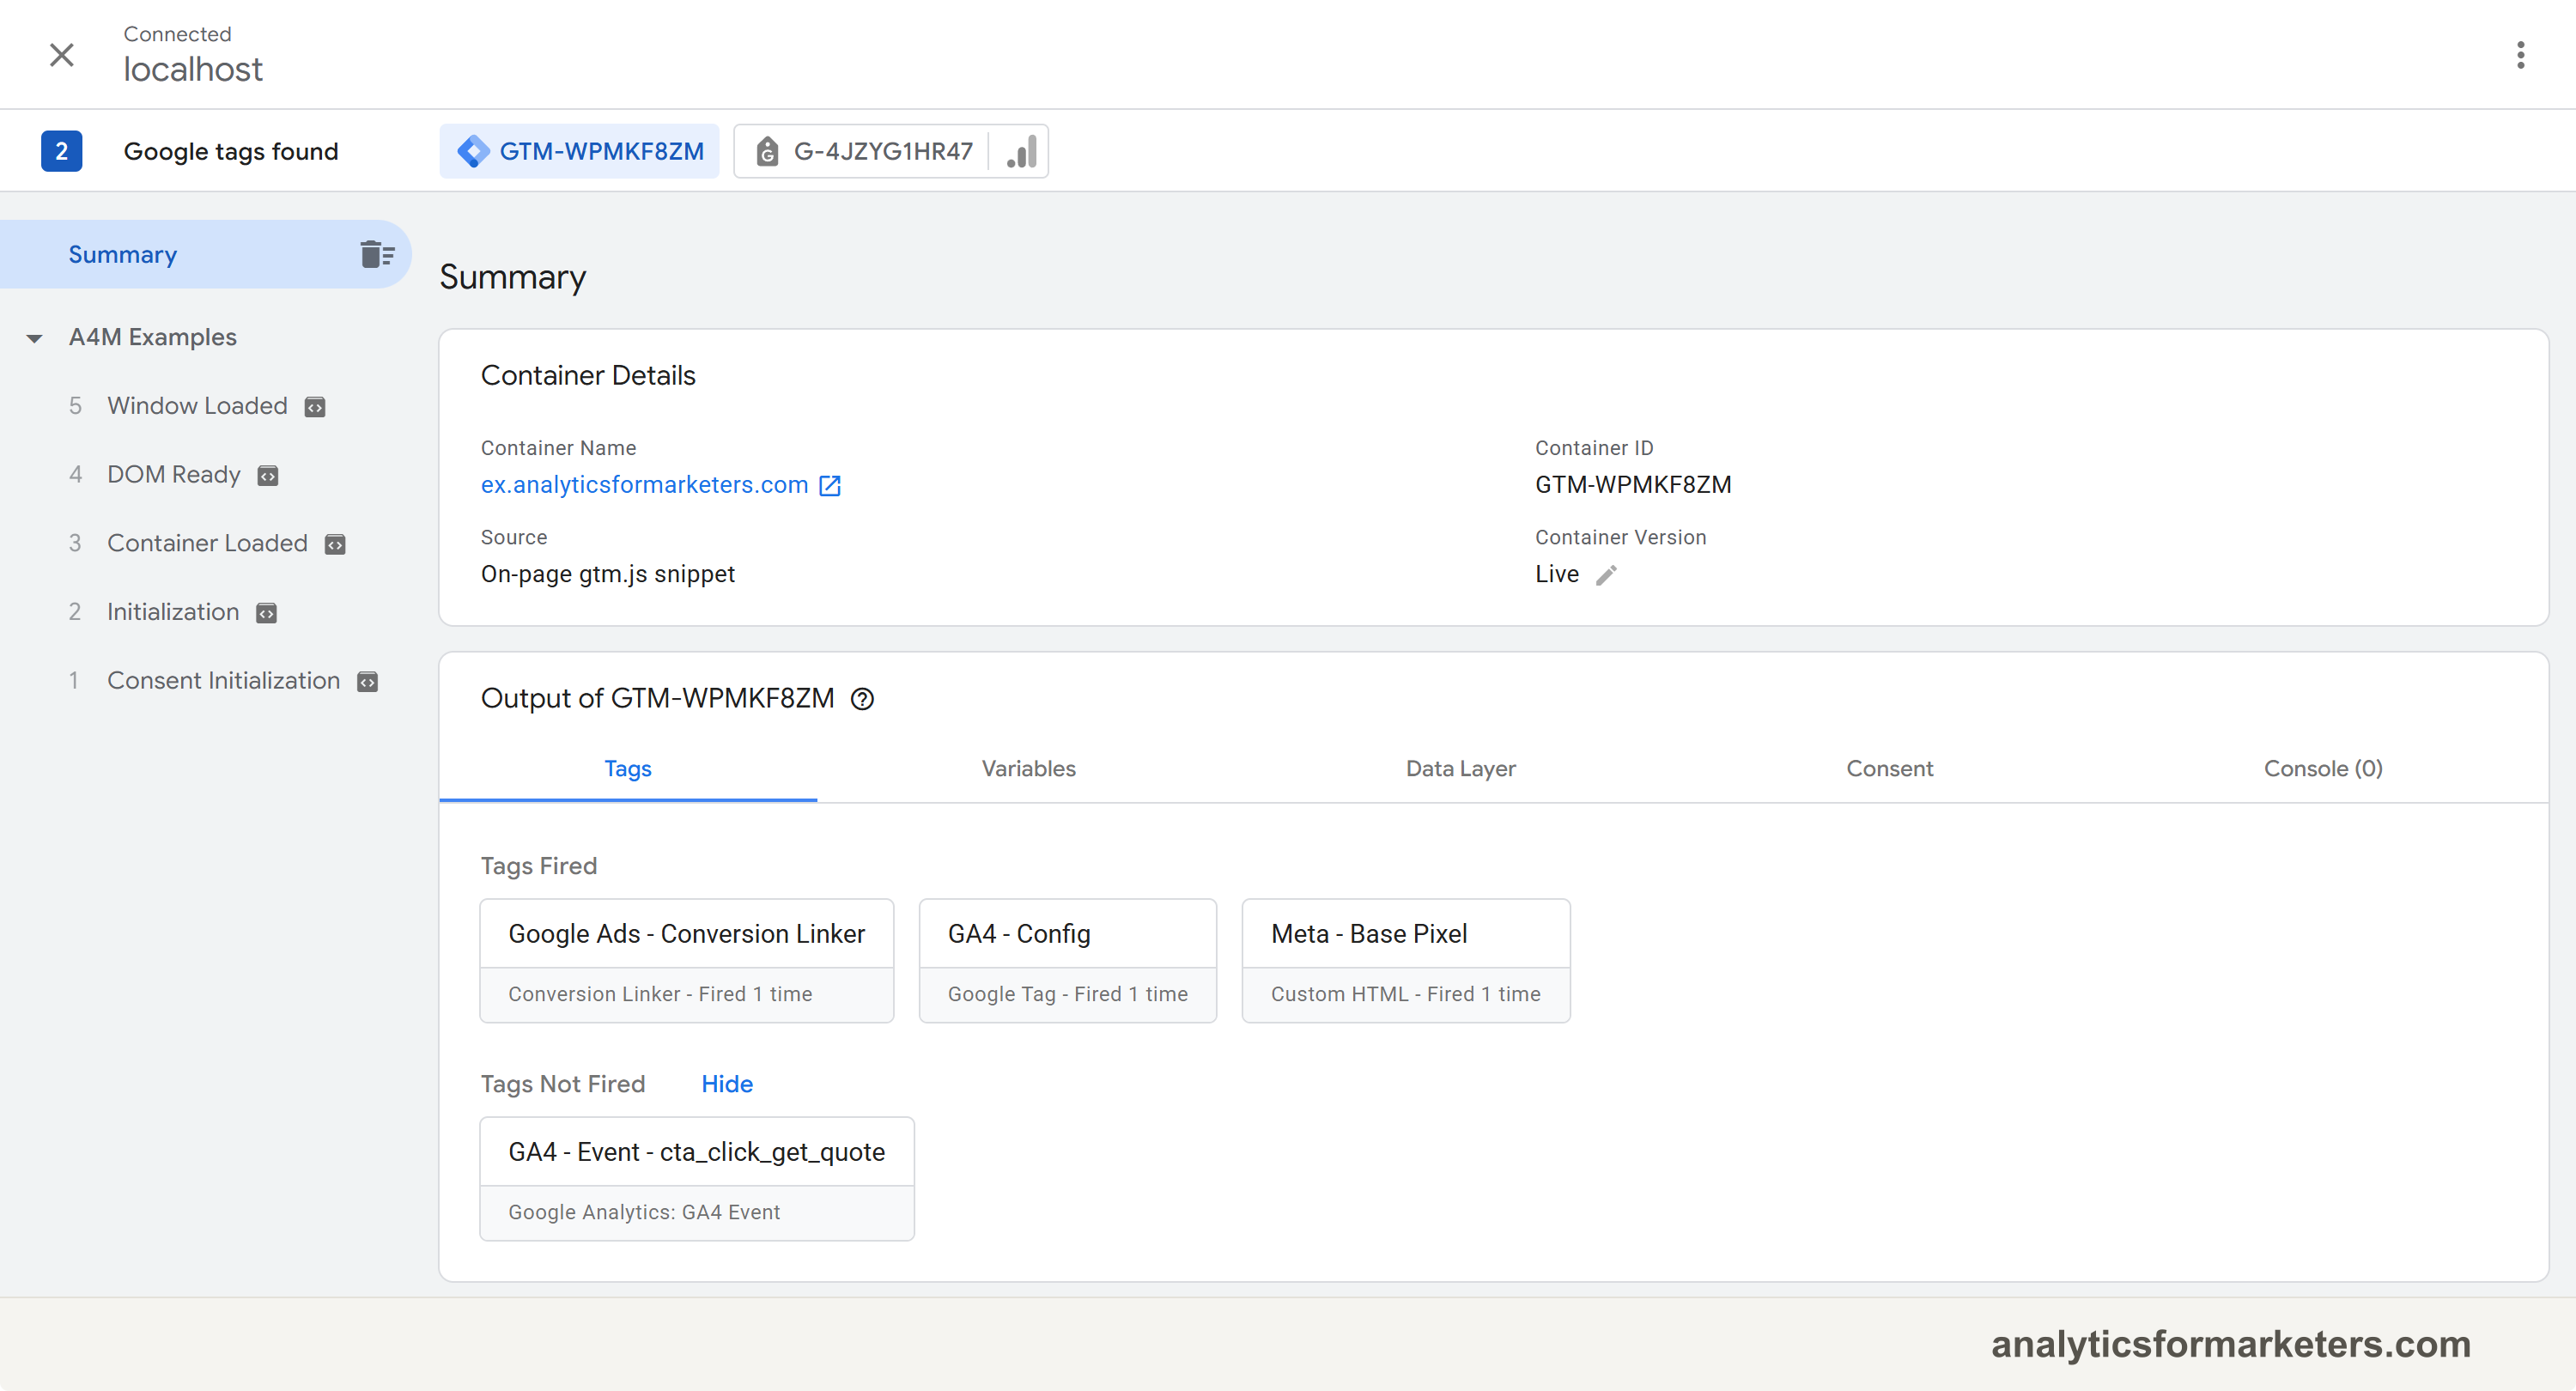
You should see: page load events (Consent Initialization, Initialization, Container Loaded) appearing for each page you visit. If your container is brand new, “Tags Fired” will be empty, and that’s correct: GTM is installed, it just has no tags yet.
If Tag Assistant can’t connect, the usual suspects are a caching plugin serving old pages (clear your cache), an ad blocker in the browser you’re testing with, or the snippet sitting in only some pages because a theme or builder template didn’t apply site-wide.
What to set up next
An empty container tracks nothing; it’s infrastructure waiting for tags. The natural next steps, in order:
- Add Google Analytics 4 through GTM so your pageview tracking lives in the container: how to add GA4 with Tag Manager. If GA4 currently loads through another plugin (Site Kit, MonsterInsights, or a pasted snippet), remove that install once the GTM version is live, or every visit counts twice.
- Track your first real interaction, like clicks on a signup button: how to track button clicks with GTM.
- Name things properly from day one. Containers get messy fast; a naming convention for tags, triggers, and variables keeps yours readable.
And if you haven’t put GA4 on this site at all yet, our GA4 on WordPress guide compares the plugin routes with the GTM route so you can pick one cleanly.